How to Prepare the Exterior of Your House for Painting (What Pros Do)
Published March 2026 - Joseph Assise III Painting & Wallpapering, Easton PA
The biggest separator between a paint job that lasts a decade and one that starts peeling in three years is almost never the paint product. It is the preparation. Professional painters know this instinctively - prep is where the real work happens, and it is where many homeowners and less-thorough contractors cut corners.
Here is exactly what a professional exterior prep process looks like, and what steps DIY painters most commonly skip. An important part of prep is knowing how long to wait after pressure washing before painting - getting this wrong is one of the most common causes of early paint failure.
Why Prep Is 70% of the Job
Paint is a surface coating. It bonds to whatever is underneath it. If what is underneath is dirty, chalky, peeling, or poorly sealed, the new coating inherits all of those problems. A fresh topcoat over failing paint still fails. A topcoat over an unplugged gap at a trim joint still lets moisture in behind it. Paint does not fix problems - it covers them temporarily until they resurface, often worse than before.
On a typical exterior paint project, professional painters spend more hours on prep than on actual painting. That ratio surprises many homeowners, but it is what produces a job that holds up through Pennsylvania winters, freeze-thaw cycles, and humid summers.
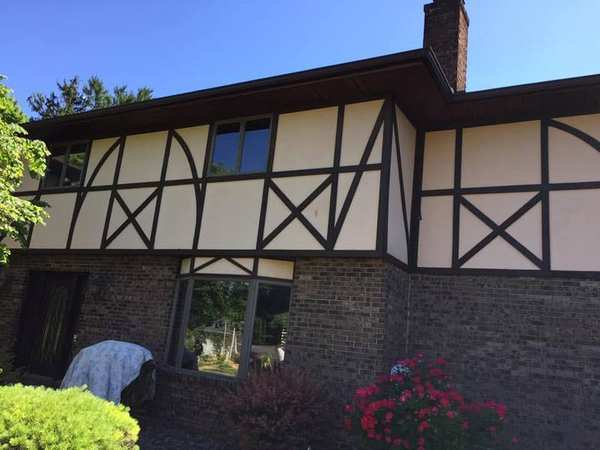
The Professional Exterior Prep Process - Step by Step
- Power washing. Every professional exterior project starts with power washing the entire surface. This removes mildew, chalk, dirt, loose paint, and surface contamination. Use 2,500 to 3,000 PSI for most residential siding, keeping the nozzle at least 12 to 18 inches from the surface to avoid driving water into laps and joints. Allow the siding to dry completely - typically 48 hours of dry weather - before proceeding.
- Scraping loose and failing paint. After washing and drying, any paint that is still peeling, flaking, or lifting must be removed mechanically. Professionals use scrapers, 5-in-1 tools, and oscillating multi-tools for this work. The standard is simple: if paint lifts when you press a putty knife under it, it comes off. Painting over loose paint is the number one cause of premature failure.
- Sanding feathered edges. Where paint has been scraped back to bare wood, the edge between existing paint and bare wood creates a ridge that will show in the finished surface. Sand these edges smooth so the transition is gradual - this is called feathering. Use 80 or 100-grit sandpaper on a sanding block or orbital sander.
- Repairing damaged wood. Any wood that has softened, rotted, or crumbled must be addressed before painting. Small areas of rot can be treated with epoxy wood consolidant and filler. Larger areas of rotted wood need to be replaced. Painting over rotted wood does not stabilize it - it just hides the damage temporarily while the rot continues to expand.
- Caulking gaps at all trim joints. Every gap where siding meets trim, trim meets trim, and trim meets the house at windows, doors, corners, and soffits should be caulked with a quality paintable exterior caulk. These gaps are where water enters the wall assembly and causes interior damage and paint failure from behind. Use a siliconized acrylic caulk rated for exterior use. Tool it smooth with a wet finger and let it cure before priming.
- Priming bare wood and repairs. Any surface where existing paint was removed or wood is exposed needs spot primer before topcoat. Use a high-quality oil-based or 100% acrylic exterior primer. Skipping primer on bare spots causes uneven sheen, poor adhesion, and faster failure at the repaired areas. If chalking was present on the old paint surface, prime the entire surface with a bonding primer.
- Masking windows, doors, and trim. Mask glass panes, door hardware, and any surfaces that should not be painted. Use quality painter's tape pressed firmly to all edges. Protect landscape plants, lights, and decorative features with drop cloths or plastic sheeting.
What DIY Painters Commonly Skip
The most frequently skipped steps in DIY exterior prep are: waiting the full 48 hours after power washing before painting, scraping all loose paint rather than just the obviously peeling areas, and caulking every gap rather than just the obvious ones. These are exactly the steps that determine how long the job holds up. A DIY painter who skips two or three of these steps is not saving time - they are shortening the life of the paint job by years. Once prep is done right, the next step is choosing a palette that performs - see our guide to the best exterior colors for 2026.
Frequently Asked Questions
Can you paint the exterior without power washing first?
No. Painting over surface contamination - chalk, mildew, dirt, or airborne grease - guarantees adhesion problems. Even a house that looks clean to the eye has a surface film that interferes with paint bonding. Power washing is non-negotiable for any exterior job that is meant to last. The only exception is a brand-new build where the siding has never been exposed - even then, a thorough cleaning of the bare material is required before priming.
Do I need primer for exterior painting?
You need primer anywhere bare wood is exposed, anywhere old paint has been scraped back, and anywhere chalking was present on the old surface. You also need a bonding primer if the existing paint is oil-based and you are switching to latex. Spot priming bare areas before topcoat is mandatory. Skipping it causes adhesion failure at those spots within the first year.
How long after power washing can you paint the exterior?
Minimum 48 hours of dry weather after power washing before applying any coating. Some contractors prefer 72 hours. Wood siding retains moisture in the grain even when the surface feels dry to the touch. Painting over wet or damp wood traps moisture in the substrate, which causes blistering and peeling as the moisture tries to escape through the paint film. In humid Lehigh Valley summer conditions, consider waiting even longer.
What do professional painters do that DIYers skip most often?
The biggest gaps between professional work and DIY are: thorough scraping of all loose paint rather than painting over marginal areas, full caulking of all trim joints and penetrations rather than just obvious gaps, waiting the full drying window after washing, and applying primer to all bare spots before topcoating. Professional painters also work systematically around the house rather than painting random sections, which ensures wet edges do not dry before the next section connects to them.